Package.swift - Getting Started with the SPM Manifest file
In the previous article, I talked about why Swift Package Manager has so many advantages over older package managers. In this article we'll talk about getting started:
- using a package in Xcode
- creating a package in Xcode or with the
swiftcommand - how the manifest Package.swift file for your Swift Package works
Using a Package in Your App
There are two ways to get started using Swift Package Manager for your project in Xcode.

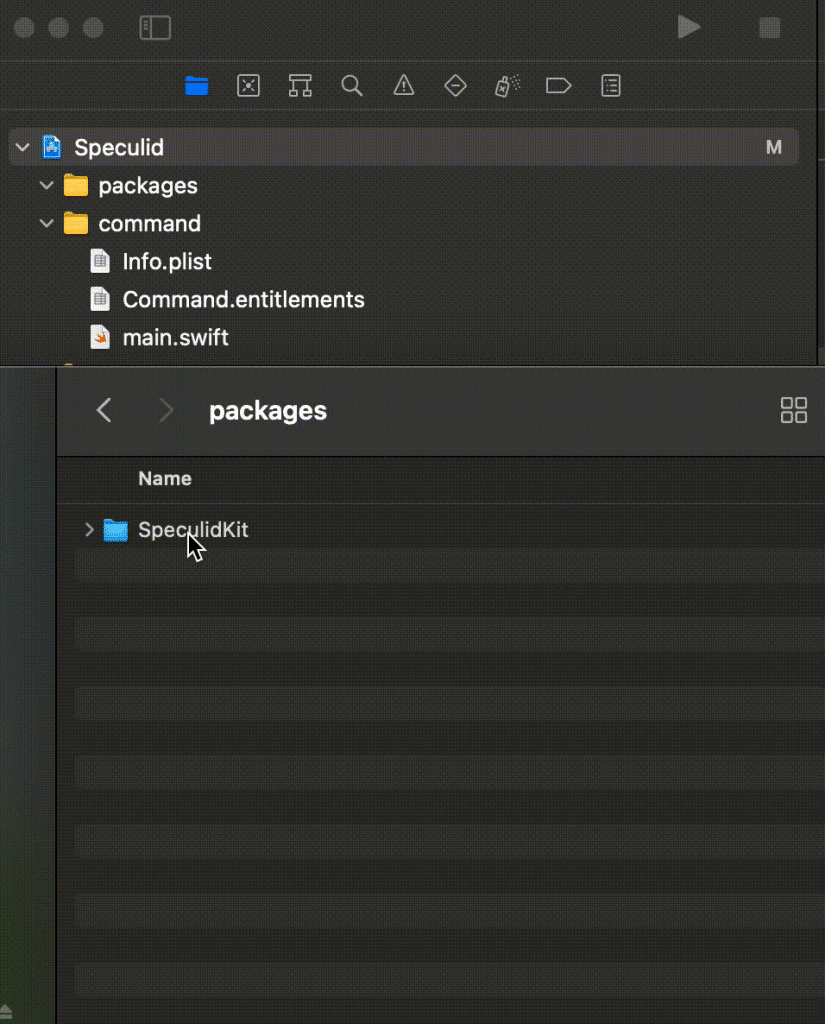
First, you can simply drag the folder into your Xcode project. This is the ideal way, when you are planning on working on the Xcode project while working on its dependent Swift Package.

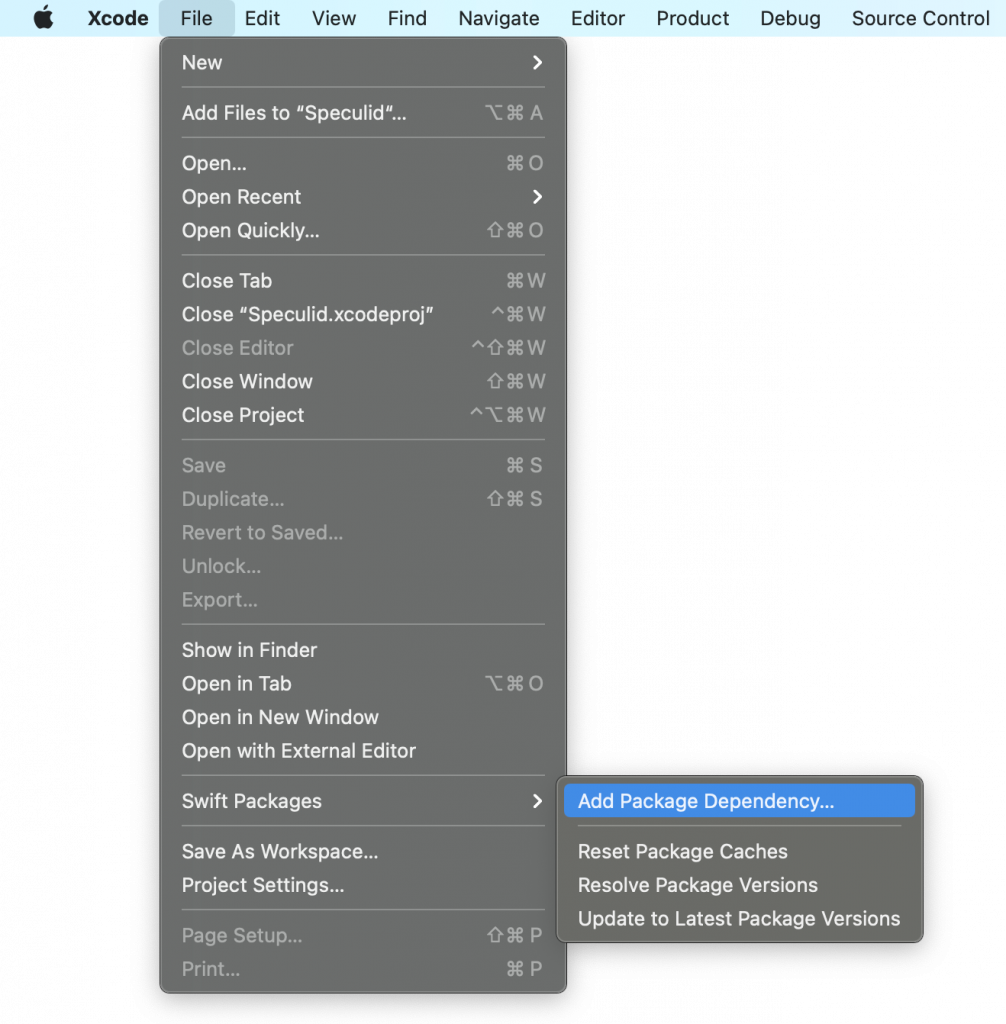
Otherwise, you can add the package dependency within the file menu in Xcode.
Creating a Package
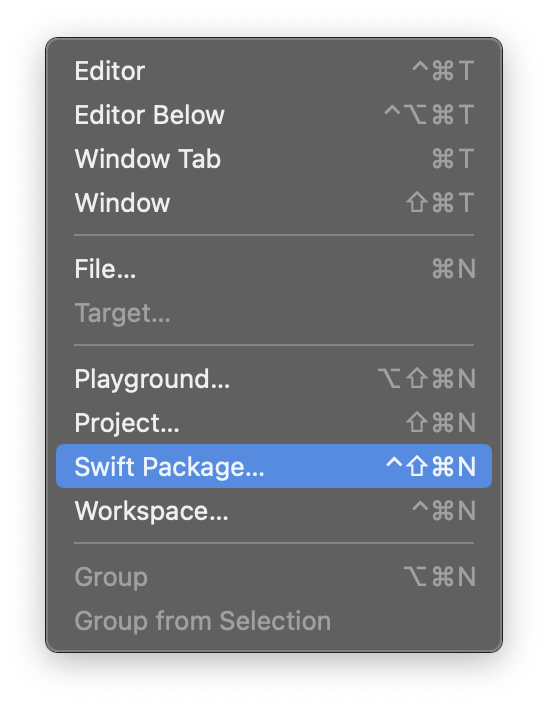
Xcode also allows you to create a new package. You can do this by going to file new and Swift package to create a package in Xcode.

Besides Xcode, you can also create one via the command line as well. Assuming you have Xcode or Swift installed on your machine, you could simply run:
     > mkdir New-Package
    > swift package init
By default, it'll use the directory name for the name of your package. Otherwise you can customize the name with the command line option
--name. Additionally you can also specify the type of package you want with the option --type. By default it'll use the library package type. When it creates a library package, it'll create the Package.swift file, the sources directory as well as one for your tests. If you create an executable, it will create a main dot Swift for your executable to run.
Either Xcode or the Swift command line will create the necessary files and directories to get started.
In the end, you should have:
- Source directory for your main source code
- Tests directory for your testing suite
- Package.swift, the core of every Swift package
Package.swift - Anatomy of a Manifest File
The main piece that specifies the configuration of your package is the Package. swift file. Let's take a look at the anatomy of this special file
swift tools version
At the very top, we see it specifies the Swift tools version this package requires. If you want to support some of the newer features like binary targets or newer operating systems, you're going to have to specify a newer version of Swift. Otherwise you can always use the minimum version required.
A Package Instance
At its core, the Package.swift is a Swift file and therefore contains Swift code for describing the package. Therefore you need to import the PackageDescription module, which is built in.
From here we can begin to describe the package by creating an instance of a package object inside. The first required parameter for our package is the name followed by our package’s dependencies.
Defining Dependencies
Now let's talk about how to dependencies are defined in a Package.swift file. Typically there 3 components:
- the name of the dependency
- The git url or local path of the dependency - if you intend to work on the dependencies simultaneously you’ll need to use a local path
- the version number or some sort of git reference
In all cases some sort version is required for all dependencies. There are multiple ways to specify the version you want. Most involve the semver numbering system.

How SemVer in Dependencies work
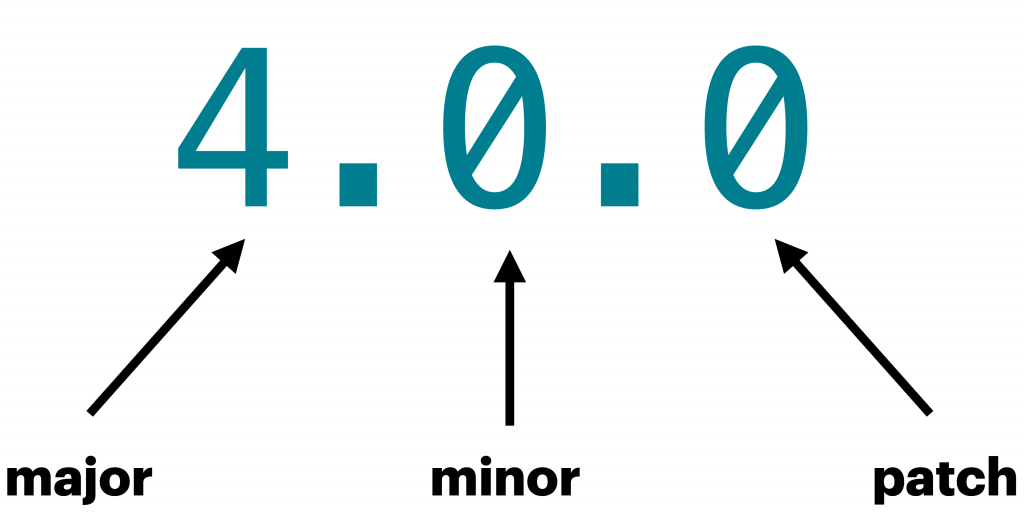
There are typically three components: major, minor, and patch. For instance with the string “4.0.1”:
- Major is 4
- Minor is 0
- Patch is 1
In most cases, you’ll want to just use the semver string which is automatically resolved up to the next major version based on the repository’s available tags.
If you wish to be more specific about the version you wish to use, there are enumerations available to you to do just that.
upToNextMajoris which equivalent to just using a string will search for tags from the version to the next major version, so 4.0.1 resolves from 4.0.1 to 5.0.0 but not includingupToNextMinorwill search for tags from the version to the next minor version, so 4.0.1 resolves from 4.0.1 to 4.1.0 but not includingexactwill search for tags with the exact version number only
Not only can use a semver string but you can specify a branch or revision hash as well. However in most cases, the practice is to use just the semver string which is equivalent to upToNextMajor.
Targets and Products
Targets are the building blocks of your Swift package. Your targets will reference a set of Swift files which will be compiled into a module or test suite. There are four targets you should know about:
target- a set of code to be used in a library (or main target in executable if swift-tools-version 5.3 or older)testTarget- a set of code to be used in a test suitebinaryTarget- an compiled binary XCFrameworkexecutableTarget- a set of code to be used as the main target (i.e.mainentry point) in a executable for swift tools version 5.4 and newer
Targets can refers to other targets in the same package as dependencies. Additionally with our dependencies defined in this file, we can access their products as well. Specifically, we can refer to the products of those dependencies in our target’s dependencies. Once that’s done, we can access that dependency’s API in our code. In most cases you can simply use a string referring to product name of the dependency. However in same instance you need to specify the source package using the static func Target.Dependency.product.
If we want our executable or library available outside of the package, we need to define products in our Package.swift file as well. In this case, there are only two types of products: executable or library. Both require parameters for name and targets it contains. Additionally with libraries you can specify whether your library should static or dynamically linked.
To clarify the differences between products and targets:
- Targets are internal; Products are external (i.e. available to anyone)
- Targets can depend on other targets; products can contain multiple targets; targets can depend on dependency products
Typically you’ll have one product per target as well as a test target for your product. In more complex packages such as the SPM package itself, you can see how multiple targets are organized and used.
More Resources
If you are interested in learning more about the Package.swift file, check these resources out:
- The Swift package manifest file - Tibor Bödecs
- SPM Repo Documentation
- Swift.org SPM Documentation
- Apple SPM Documentation
Xcode Not Required
One important thing to note is that you do not need to open Xcode to compile the Swift package. Obviously there are benefits to using Xcode for editing your Swift code. However you can use any text editor to create and edit your files. (Or use the terminal to create your file via
touch FileName.swift. To compile the package you can simply type in the terminal: swift build.
As a matter of factor you don't even need a Mac. In the next article, we'll talk about some ways to automate and verify your build with CI and git hook integration.