Asynchronous Multi-Threaded Parallel World of Swift
Over the last 15 years, CPU clock rate has plateaued due to thermal limitations in processors. As a result, CPU manufactures have instead chosen to add more cores or processing units. Therefore nearly every device has multiple cores: from a Mac Pro to the Apple Watch. For this reason, Swift developers should take advantage of asynchronous methods.

That is to say, with asynchronous methods, we can design applications which take advantage of multiple cores and deliver a better user experience. Therefore, let’s discuss:
- Understanding Parallelism, Concurrency, and Asynchronous
- How Operating Systems Breakdown Operations
- Situations Swift Developers Run Into
- Discrete APIs
- Working with Queues
- Dealing with Promises and Futures
- Subscribers and Publishers with Combine
- The Future with Coroutines
Understanding Concepts
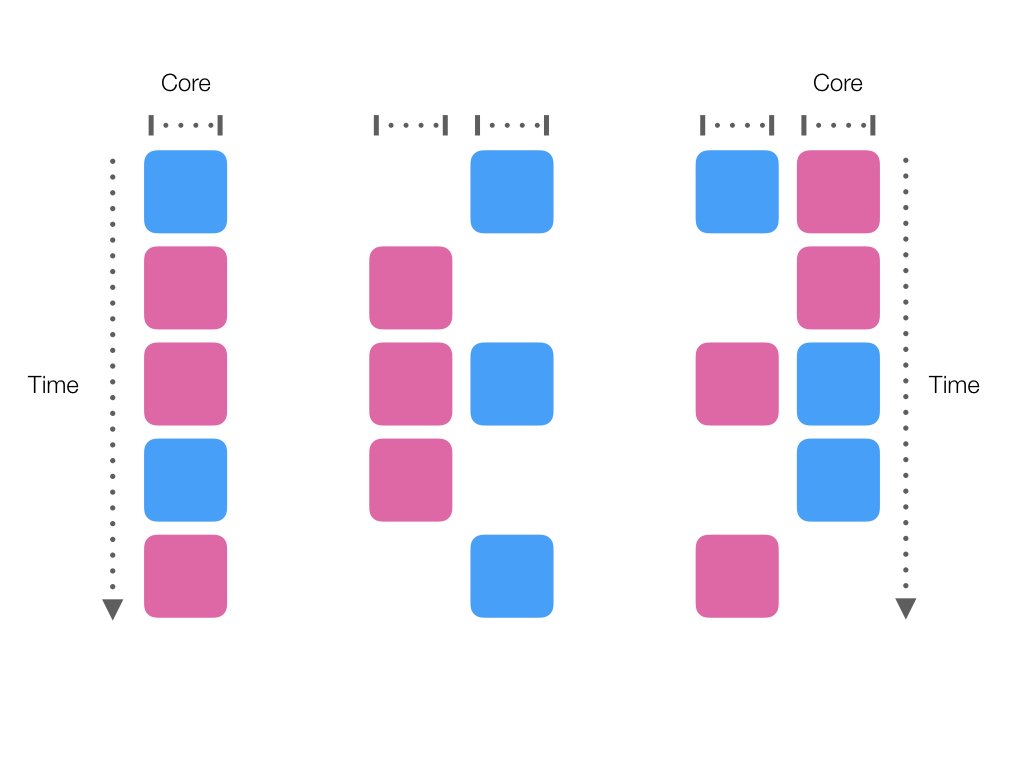
First, we need to understand how operating systems handle tasks and how they can schedule them efficiently. As an example, lets look at the two independent operations. In this case, we have a pink one which is processing image A and a blue one which is processing image B.
Concurrency and Parallelism
When these operations are scheduled by the operating system, they can be run concurrently. Concurrency means that the operation can be partitioned and run at the same time on the same processor.
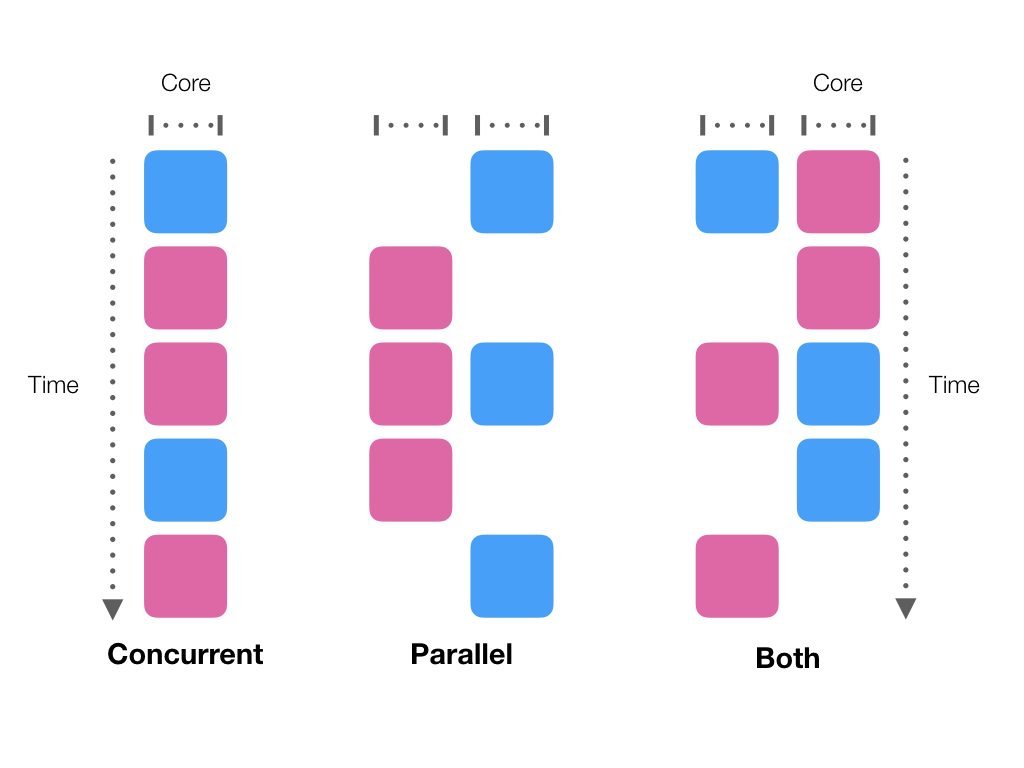
In addition, when the operating system has access to multiple processing units or cores, it can also run the operations in parallel. To put it differently both operations can be run on separate processing units. In essence, Parallelism differs from concurrency in that concurrency partitions each operation in order to continue different operations. Therefore, concurrency can be applied to a single processing unit. Conversely, Parallelism can only be applied to multiple processing units. Moreover, concurrency and parallelism can be applied at the same time by the operating system. Most importantly for developers is to make our operations asynchronous, in order to allow for concurrency and parallelism.
Asynchronous Operations
There are long operations, such as network requests, which are not well suited for standard synchronous operations. That is to say, by programming these calls synchronously, it will lock up other active operations such as user interface updates. Therefore making these calls asynchronous allows for other operations to be run concurrently. Specifically this is done in Swift, by including a completion closure or code block as a parameter. To put it differently, when the operation is completed that closure is executed on completion with a result passed.
For instance rather than actively waiting for a download to complete, the API allows the developer to pass what code they want the application to run when the operation is completed. Notably, this allows the operating system to schedule other operations in meantime like updating your UI. With this in mind, let’s take a look at the several ways Swift developers already run into this.
Where do we run into asynchronous operations?
Swift developers are already taking advantage of concurrency with asynchronous functions in their applications. Primary there are three APIs we commonly see:
- Network Requests
- NotificationCenter
- Timers
Network Requests and URLSession
Network requests are the most frequent example where asynchronous calls make the most sense. While the developer can call a Data constructor to pull contents from a url, Apple already provides an asynchronous method to do this:
let url = URL(string:
 "https://jaspervdj.be/lorem-markdownum/markdown.txt")!
URLSession.shared.dataTask(with: url) {
 (data, response, error) in
  ...
}.resume()
In this example, a URLSessionDataTask is created with a callback which takes in the binary Data, the URLResponse, and possible Error. The API will handle the buffering of data and calculating when the request is complete. Additionally it will do it as a separate operation. As a result, the operating system can run other operations concurrently. Likewise NotificationCenter does this as well.
NotificationCenter
URLSession.shared.dataTask(with: url) { (data, response, error) in
  NotificationCenter.default.post(name: notificationDownloaded, object: nil)
}.resume()

NotificationCenter.default.addObserver(forName: notificationDownloaded, object: nil, queue: .main) { (notification) in
  print("Notification Sent")
  PlaygroundPage.current.finishExecution()
}

PlaygroundPage.current.needsIndefiniteExecution = true
In this example, when the download is complete, the application posts a notification to NotificationCenter. Additionally, theres an observer for the notification. Therefore, once the notification is received the Playground prints a message and finishes.
Timers
The application can take this further by adding a Timer, another asynchronous operation. Timer allows developers to delay or periodically repeat an operation. Once again, the API takes advantage of concurrency rather than locking up the application.
NotificationCenter.default.addObserver(forName: notificationDownloaded, object: nil, queue: .main) { (notification) in
  print("Notification Received")
  Timer.scheduledTimer(withTimeInterval: 1.0, repeats: false) { _ in
    print("Timer Activated")
    PlaygroundPage.current.finishExecution()
  }
}
In this example, the code doesn't print the message as before. Rather, a
Timer is initialized with a 1 second delay. Therefore when the time approaches, the Playground prints the message and completes.
Although these asynchronous abstraction offer a convenient way to optimize your applications, there are problems which do come up. Primarily on iOS, the developer isn't able to prioritize each operation. As a result, this is most noticeable is when the developer attempts to update the user interface.
Asynchronous UI Updating with the Main Queue
One of the first lessons, developers learn when developing for the iPhone or iPad is necessity to make user interface updates on the main thread or DispatchQueue. Whether it’s simply updating a UILabel or a
UITableViewCell, the UI update needs to be on the main
DispatchQueue. Therefore, the operation needs to hop to another queue in order to complete the update to the user interface.
let timerSource = DispatchSource.makeTimerSource(flags: [], queue: .global())
timerSource.setEventHandler {
  DispatchQueue.main.async {
    viewController.label.text = "Timer Activated"
  }
}
timerSource.schedule(deadline: .now() + 1.0)

NotificationCenter.default.addObserver(forName: notificationDownloaded, object: nil, queue: .main) { (notification) in
  print("Notification Received")
  timerSource.activate()
}
In this example, DispatchSourceTimer is created. DispatchSourceTimer is similar to Timer, however the developer has more control over the priority and the queue. As with the previous Timer, when the
Notification is observed, the Timer is started with a 1 second delay. However since the DispatchSourceTimer is designated for using the global queue, it is nessecary to hop to the main
DispatchQueue and update a UILabel with the text Timer Activated. Consequently if this is not done, the user interface will not update correctly. Before I explain further how DispatchQueue and Grand Central Dispatch works, let’s breakdown how operating systems schedule operations.
How Operating Systems Handle Operations
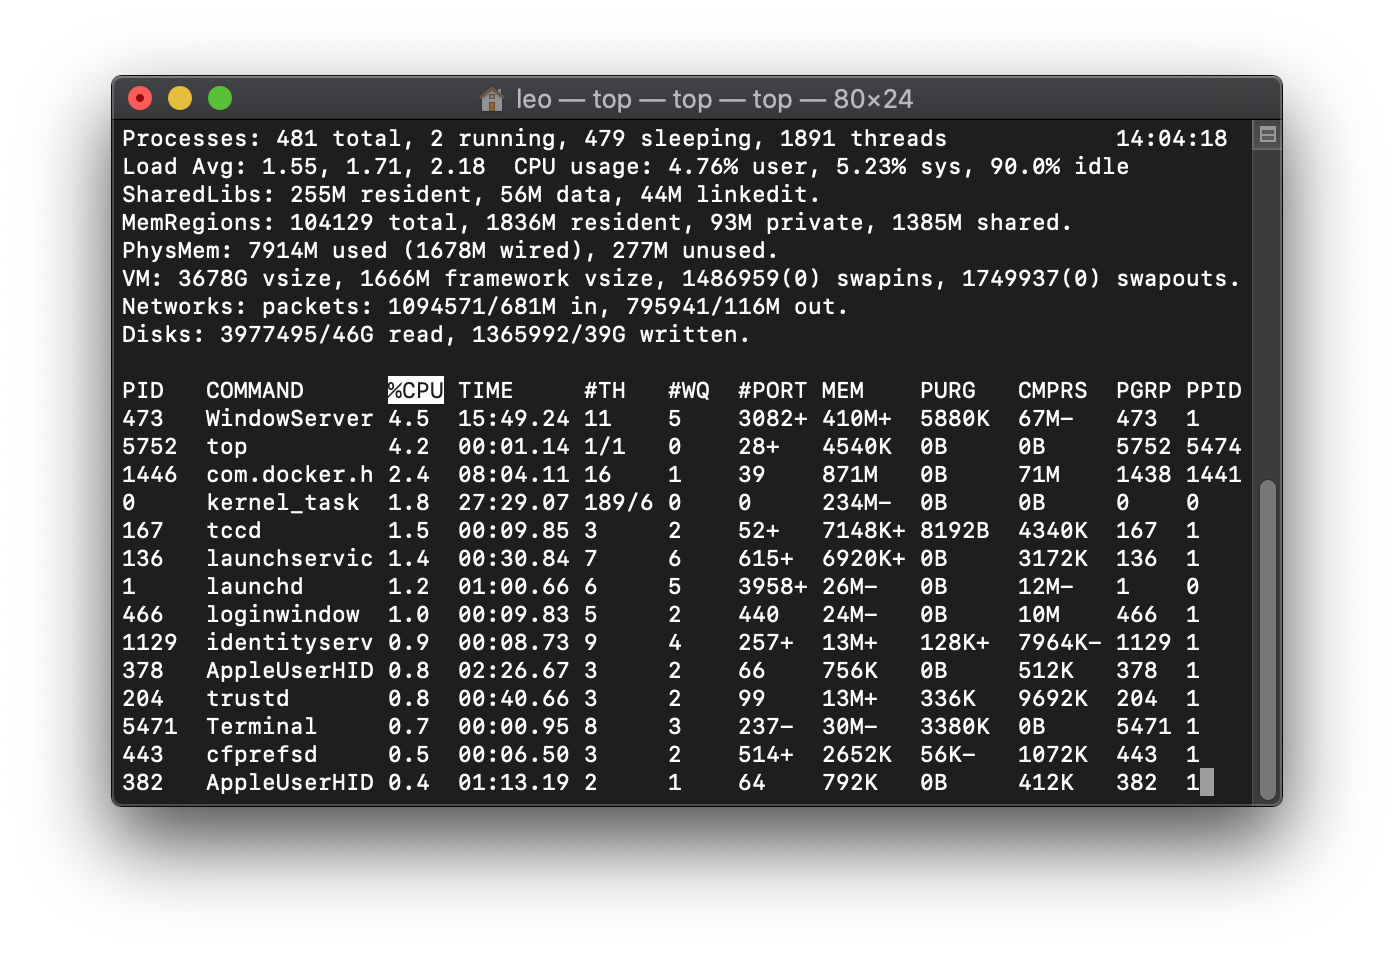
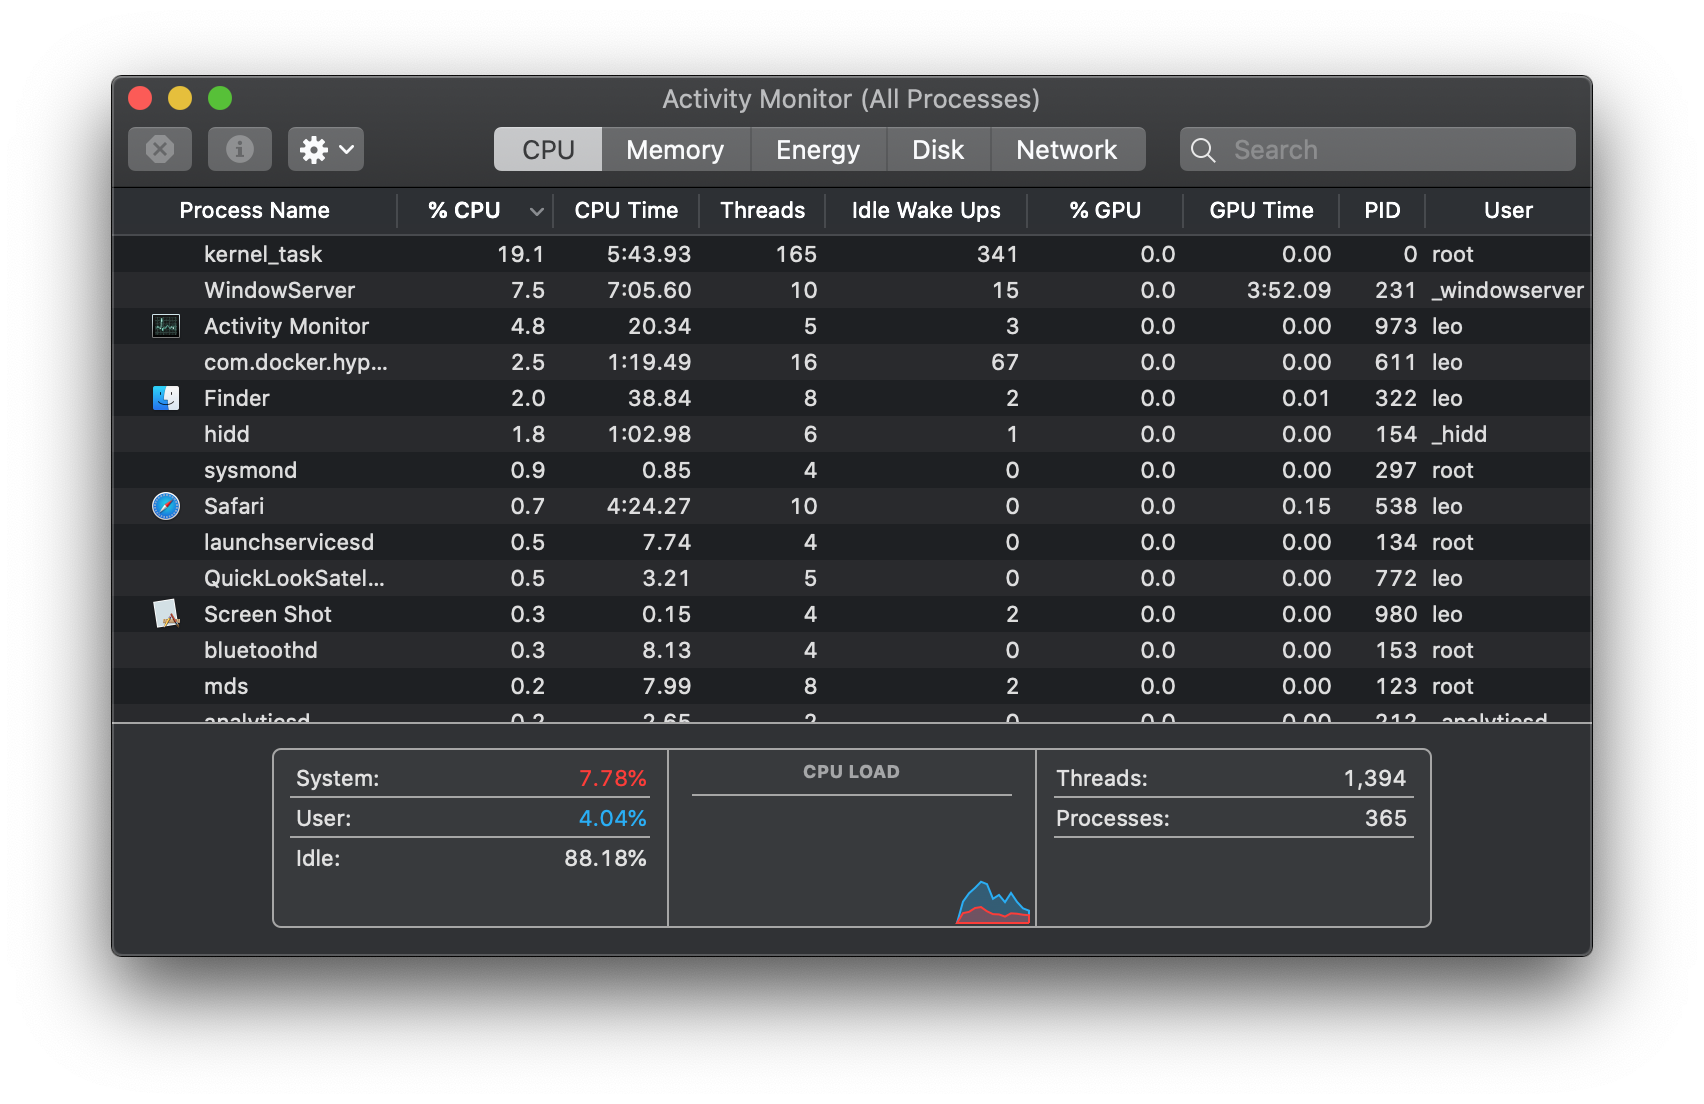
Operating System have two level of controlling operations: Processes and Threads. A process is a running instance of an application such as this running instance of Activity Monitor listing out actual processes:
Moreover, a developer can breakdown a process into threads. A thread is a small sequence of instructions within a process which the operating system can schedule individually. In other words, a developer can breakdown a running application into parts which give the operating system more leeway in scheduling tasks.
Therefore, let's discuss the various ways developers can organize individuals operations in Swift. Firstly let's discuss the most direct control of threads and processes and slowly evolve into the more abstract and easy to manage.

Original Apple APIs
Over the years, Apple has evolved its API for giving developers control over their operations and their scheduling. At first, the API was pretty basic and direct but has become increasing developer-friendly and given more control to the operating system as to how to manage it.
Thread Class
Although this may be true, let's start by at least touching upon that most direct API: Thread (or NSThread in Objective-C). The Thread class gives the developer direct access to creating actual threads. Their are two ways to do this: pass in a closure to the initializer or subclass and override the main method.
Although this API is available, I would recommend against using it unless you absolutely have to. As you'll see, there are better abstractions which give better control to the operating system and are easy to maintain for the developer.
Process Class (for macOS only)
However there are occasions on the Mac, where you need to run a command or external application. In that case it's best to use the Process class (or NSTask in Objective-C). With the Process class, you provide a url to the executable and run:
let process = Process()
process.executableURL = URL(fileURLWithPath: "/bin/ls")
process.terminationHandler = {
  _ in
  PlaygroundPage.current.finishExecution()
}

try process.run()
While directly creating threads takes control away from the API and operating system, I think this is perfectly reasonable. In instances where a piece of functionality is already available on macOS running another outside process makes sense. As with many operations, it is important to make sure it does not interfere with the user experience. While there's the function waitUnitExit in order which provides a synchronous result from the operation, using the property
terminationHandler, allows for asynchronous callback. That is to stay, using terminationHandler allows the application to do other operation as it waits for that process to finish.

Working with Queues and Asynchronous Operations
While the Process and Thread class gives developers direct control, Apple has introduced more abstract ways of dealing with operations. At the top of those abstraction is the all important Grand Central Dispatch.
Grand Central Dispatch
Grand Central Dispatch is by far the most used API for dealing with parallelism and concurrency through asynchronous operations. Specially, the most important class in that API is the DispatchQueue class. DispatchQueue allows for the developer to control the scheduling of operations. Additionally, the developer can guide some more abstract aspects regarding how the operating system organizes the operations.
For instance, if we were to count from 0 to 1000 within a Playground in two different DispatchQueues: the high-priority main queue and the lower-priority global queue, the code would look like this:
PlaygroundPage.current.needsIndefiniteExecution = true

DispatchQueue.global().async {
  var value = 0
  repeat {
    print("glob", value)
    value += 1
  } while(value < 1000)
}

DispatchQueue.main.async {
  var value = 0
  repeat {
    print("main", value)
    value += 1
  } while(value < 1000)
  PlaygroundPage.current.finishExecution()
}
By doing this, we would see the counting for each queue interleaved with each other:
...
main 947
glob 814
glob 815
main 948
glob 816
main 949
glob 817
main 950
glob 818
main 951
glob 819
main 952
main 953
...
In the example above the developer can control the priority or queue of the code block, however there are more ways we can control the DispatchQueue through the use of flags, quality of service and attributes:
let barrierQ = DispatchQueue(label: "barrier", qos: .default, attributes: .concurrent)
…
barrierQ.async{
  markdownFiles.append(text)
}
As we can see, we've created our own DispatchQueue and noted that it is concurrent. In other words, while the each operation we add is run in order, the following operation will not wait for the previous operation to complete. What must be remembered is that running multiple operations concurrently can result in what's called a Race Condition.
Dealing with Race Conditions in GCD
A Race Condition is where multiple operations are dependent on a single changeable object or variable resulting in the possibility in an error. For instance here's an example of a Race Condition issue using the Thread class API:
func increaseTo(_ max: Int) {
  var next:Int
  repeat {
    next = (items.last ?? 0) + 1
    Thread.sleep(forTimeInterval: 0.1)
    items.append(next)
  }
  while (next <= max)
}
As a result of running this in two separate threads, we could get something like this:
1
2
3
4
5
6
7
8
9
10
10 // 😱 Oh No! 😱
11 // 😢
11 // 😭
Luckily Grand Central Dispatch provides two ways of resolving this through barriers: semaphores and flags.
Semaphores in GCD
A great use of the DispatchSemaphore is in the Thread example:
let semaphore = DispatchSemaphore(value: 1)

func increaseTo(_ max: Int) {
  var next:Int
  repeat {
    semaphore.wait()
    next = (items.last ?? 0) + 1
    Thread.sleep(forTimeInterval: 0.1)
    items.append(next)
    semaphore.signal()
  }
  while (next <= max)
}
In this example, we are more or less locking down the reading and writing to the array so it only can be executing by one thread at a time. In other words, the operation between .wait() and .signal() is executing atomically.
Barriers using DispatchWorkItemFlags
In contrast, with a DispatchQueue, we can provide a flag to ensure the
markdownFiles is accessed atomically, we can use the .barrier flag:
let barrierQ = DispatchQueue(label: "barrier", qos: .default, attributes: .concurrent)
…
barrierQ.async(group: nil, qos: .default, flags: .barrier) {
  markdownFiles.append(text)
}
Organizing Multiple Operations with DispatchGroup
Besides DispatchQueue another great use of Grand Central Dispatch is DispatchGroup. For instance, if you have multiple asynchronous operations which are not dependent on each other such multiple url calls, DispatchGroup is perfect. DispatchGroup allows the developer to track their asynchronous completion as a whole:
let group = DispatchGroup()
let count = 20
var markdownFiles = [String](repeating: "", count: count)

for index in (0..<count) {
  group.enter()
  DispatchQueue.global(qos: .background)
  .async {
    markdownFiles[index] =
      try! String(contentsOf: url)
    group.leave()
    print(index)
  }
}
In the example above, we create a DispatchGroup. Next, the code asynchronously downloads 20 markdown files and sets the result in the array. Markedly, each time group.enter() is called when the process starts and group.leave() is called to note that particular operation is completed. Lastly, the developer can call either notify or wait on the DispatchGroup depending on whether to wait asynchronously or synchronously.
One of the more complex natures of multiple asynchronous operations is organizing dependencies. Therefore let's discuss the next level of abstraction which specialized in dependencies - OperationQueues.
Operation Queues
An older yet more abstract API for dealing with multiple Operations is the OperationQueue (or NSOperationQueue in Objective-C). A preferred method for dealing with operations, OperationQueues are fairly to simple to get started:
let operation = BlockOperation {
  for index in 1...100 {
    print(index)
  }
}
OperationQueue.main.addOperation(operation)
In this example, we simply add a BlockOperation to the main queue and it will automatically start printing out 1 to 100. Most importantly, its with dependencies where OperationQueue shows their potential:
let operation = BlockOperation {
  for index in 1...100 {
    print(index)
  }
}
let anotherOperation = BlockOperation {
  for index in 101...200 {
    print(index)
  }
}
anotherOperation.addDependency(operation)
OperationQueue.main.addOperation(anotherOperation)
OperationQueue.main.addOperation(operation)
In the above example, we add a dependency of one operation (0...100) to another (101...200) to ensure that the counting is in the correct order. As a result, regardless of the order of how the operations are added, dependent operation is executed first. For this reason, the developer can add operations in whatever fashion as long as their dependencies are setup beforehand.
Problems with OperationQueue
While dependency management is easier with OperationQueues, there a couple of issues which showcase it's dated Objective-C outlook. Firstly, there is no native method for doing asynchronous operations in the Operation (or BlockOperation) class. In other words, the developer must subclass the Operation and optimize the code for asynchronous operations or convert the underlying method to an synchronous method. Secondly, there is no native way to deal with results or errors of each operation. Therefore, the developer must handle the result of each operation outside of the operation.
Instead a more modern and functional method for handling asynchronous methods and their results or errors comes in the form of Promises and Futures.

Promises and Futures of Better Asynchronous APIs
While Apple provides some abstractions for asyncronous operations, Swift developer will often run into the dreaded callback hell
doThis{
  thenThis{
  andThenThis{
    lastlyThis{
      }
  }
  }
}
This awful mess of code can be difficult to manage especially when catching error and dealing with various logic. As much as closures are superior to Objective-C code blocks, other programming languages such as JavaScript and C# have improved on this with the concept of promises and futures. In short, where a synchronous function returns a value, this abstraction allows for the returning of a promised future value.
let thatPromise = doThis(...)
let thenThisPromise = thatPromise.then(thenThis)
let andThenThisPromise = thenThisPromise.then(andThenThis)
let lastPromise = andThenThisPromise.then(lastlyThis)
Therefore, let’s take a look at a couple of Swift libraries: SwiftNIO and Google’s Promise library.
SwiftNIO - Asynchronous on the Server
While Swift's largest focus has been on the iPhone, it is important to note that the server is where asynchronous operations often occur. Whether the server is making HTTP calls to the outside or accessing a database, it has to wait for the completion of network requests. Therefore, it’s no wonder that SwiftNIO the backbone of the main server-side frameworks, Kitura and Vapor, employs its own Promise and Future infrastructure. While server-side Swift mostly uses SwiftNIO, Apple devices such as the iPhone can also use the package.
public func setupSite(_ site: Site, withTheme theme: Theme, _ completed: @escaping (Error?) -> Void)

public func setupSite(_ site: Site, withTheme theme: Theme, using eventLoop: EventLoop) -> EventLoopFuture<Site> {
  let promise = eventLoop.makePromise(of: Site.self)
  eventLoop.execute {
    self.setupSite(site, withTheme: theme) { error in
      if let error = error {
        promise.fail(error)
      } else {
        promise.succeed(site)
      }
    }
  }

  return promise.futureResult
}
In this example, there is an asynchronous function which sets up a website based on a theme. Namely, this function takes as parameters, the site, the theme, and a closure which takes in an Error if the operation failed. Given that, for the purpose of using Futures, there is a new method which returns SwiftNIO’s Future or EventLoopFuture with the resulting Site object.
Notably, in Swift, some sort of queue, thread, or loop must be specified in order to assign where the operation will be executed. Likewise, SwiftNIO uses the EventLoop to designate where the operation will be executed. Therefore, from the EventLoop, an EventLoopPromise is created. Next, from the EventLoop a closure is passed where the original asynconous setupSite function is called. From inside the closure, a success or failure state on the promise is set using .fail and .succeed. Lastly, the promise has a property which contains the future using .futureResult.
let future = setupSite(site, withTheme: theme, using: eventLoop)
future.whenComplete {
  ...
}
In most cases, the EventLoop is accessed from originating
HTTPRequest or Application. In any case, to call our Future returning function and do something with the value, whenComplete to set the callback on the resulting operation.
Functional Programming in SwiftNIO
The other advantage of promises and futures, is being able to apply functional programming concepts to future results.
let futureSite = setupSite(site, withTheme: theme, using: eventLoop)
// returns a Future<String>
let futureString = futureSite.map{
  $0.name
}

// flatMap "flattens" the Future<Future<String>> to just
// Future<String>
let futureHTML = futureSite.flatMap{
  // return Future<String>
   promise(fromAsyncLoadingSite: $0)
}

let sites: [Future<Site>]
// flatten "flattens" [Future<String>] to Future<[String]>
let siteNamesFuture = sites.map{ site in site.map{
  $0.name
}.flatten(using: eventLoop)

let nameAndHTML : Future<(String, String)> = futureString.and(futureHTML)
Therefore, with SwiftNIO:
.map- converts
Future<A>toFuture<B>by - taking in a closure of type:
(A) -> (B) .flatMap- converts
Future<A>toFuture<B>by - taking in a closure of type:
(A) -> (Future<B>) .flatten- converts
[Future<A>]toFuture<[A]>by - taking in an
EventLoop .and- on
Future<A>and takes in aFuture<B>orB - returns a
Futuretuple of typeFuture<(A,B)>
Unfortunately since network operation and server-side communication are at the center of SwiftNIO, the only way currently to create an
EventLoop on iOS is by using a MultithreadedEventLoopGroup:
let pool = MultiThreadedEventLoopGroup(numberOfThreads: 5)
let eventLoop = pool.next()
However, a better library to implement promises on iOS (and other client devices) is Google’s own Promise framework.
Google Promises - Asynchronous on the Client
While Apple makes SwiftNIO and it contains a great implementation of Futures and Promises, it is focuses on server-side and networking related implementation. However, on the client, Google Promises might be amongst the best Promise APIs for Swift.
public func setupSite(_ site: Site,
  withTheme theme: Theme,
  on queue: DispatchQueue = .main) -> Promise<Site> {
  return Promise<Site>(on: queue) { success, failure in
    self.setupSite(site, withTheme: theme) { error in
      if let error = error {
        failure(error)
      } else {
        success(site)
      }
    }
  }
}
While SwiftNIO required the proprietary EventLoop, Google Promises requires the familiar DispatchQueue. Therefore to create a Promise oriented version of setupSite, the function needs a DispatchQueue parameter and needs to return a Promise on that DispatchQueue with a closure that calls either success or failure depending on the result. Therefore to call the method, the code needs to pass a
DispatchQueue and on the Promise call .then to use the result.
let futureSite = setupSite(site, withTheme: theme, on: .main)
// returns a Promise<String>
let futureString = futureSite.then{
  $0.name
}

// returns a Promise<String>
let futureHTML = futureSite.then{
  // return Promise<String>
   promise(fromAsyncLoadingSite: $0)
}

let sites: [Promise<Site>]
// `all` "flattens" [Promise<String>] to Future<[Promise]>
let siteNamesFuture = all(sites.then{ site in
  site.map{
    $0.name
  }
)

let nameAndHTML : Promise<(String, String)> = all(futureString, futureHTML)
Functional Programming in Google Promise
Additonally while SwiftNIO differentiated .map, .flatMap, and
.whenComplete, Google Promise simplifies it into .then:
.then- converts
Promise<A>toPromise<B>by - taking in a closure of type:
(A) -> (B)or(A) -> (Promise<B>)all- converts
[Promise<A>]toPromise<[A]>or - converts
(Promise<A>, Promise<B>, …)intoPromise<(A,B,…)>
Additionally, Google Promises also has a specific method for dealing with Error or failure states:
.catch- a
Voidmethod which takes a closure of type:(Error) -> Void
As a result to fulfill a Promise, use either then and catch or
fulfill and reject:
let future = setupSite(site, withTheme: theme, on: .main)
future.fulfill {
  // on success
  ...
}.reject{
  // on error
  …
}
PromiseKit - Popular Alternative
The most popular alternative for Swift and Objective-C is PromiseKit by Max Howell. PromiseKit uses a more English-like syntax then the previous examples.
public func setupSite(_ site: Site,
  withTheme theme: Theme) -> Promise<Site> {
  return Promise<Site>{ resolver in
    self.setupSite(site, withTheme: theme) { error in
      if let error = error {
        resolver.reject(error)
      } else {
        resolver.fulfill(success)
      }
    }
  }
}
While you can specify the DispatchQueue, with PromiseKit it's typically not necessary. Promises use a Resolver which has methods which can take variety of combinations for success or failure including a Result object. Similar to Google Promises, you can call .then to make another asynchronous call or .map for a synchronous mapping.
let futureSite = setupSite(site, withTheme: theme)
// returns a Promise<String>
let futureString = futureSite.map{
  $0.name
}

// returns a Promise<String>
let futureHTML = futureSite.then{
  // return Promise<String>
   promise(fromAsyncLoadingSite: $0)
}

let sites: [Promise<Site>]
// `all` "flattens" [Promise<String>] to Future<[Promise]>
let siteNamesFuture = when(sites.map{ site in
  site.map{
    $0.name
  }
)

let nameAndHTML : Promise<(String, String)> = when(futureString, futureHTML)
Functional Programming in PromiseKit
Similar to SwiftNIO, PromiseKit differentiates between synchronous and asynchronous mappings:
.map- converts
Promise<A>toPromise<B>by - taking in a closure of type:
(A) -> (B) .then- converts
Promise<A>toPromise<B>by - taking in a closure of type:
(A) -> (Promise<B>) when- converts
[Promise<A>]toPromise<[A]>or - converts
(Promise<A>, Promise<B>, …)intoPromise<(A,B,…)>
Additionally, similar to Google Promises, PromiseKit has two ways of handling errors:
.catch- a
Voidmethod which takes a closure of type:(Error) -> Void .recover- a
Promise<T>method which takes a closure of type:(Error) -> Promise<T>
As a result to fulfill a Promise, use done and catch:
let future = setupSite(site, withTheme: theme)
future.done {
  // on success
  ...
}.catch{
  // on error
  …
}
However while Promises and Future are certainly a better way to avoid callback hell, there are recent updates which emphasis the important of user interface responsive. That is to say rather functional emphasis on optimal operations, this emphasizes the reactive nature of UI development: Combine
Combine-ing It All Together
With SwiftUI, Apple has snuck in a whole other framework for managing asynchronous tasks: Combine. With Combine, Apple is introducing an asynchronous model more reflecting the Subscriber-Publisher model used in reactive programming.
Reactive UI Focused Asynchronous Operations
While Promises and Futures handle how to deal with the results of asynchronous operations, Combine focuses on reacting to multiple changes in multiple locations. For instance, a Publisher issues changes to data and a Subscriber listens to the those changes. Therefore SwiftUI becomes the ideal use case for using Combine with data changes. For instance, if we have a SwiftUI View which displays the header from a downloaded markdown file:
struct ContentView: View {
  @ObservedObject var nameObject: ContentObject

  var body: some View {
    Text(nameObject.name)
  }
}
In this case, this SwiftUI View contains a ObservedObject with a name property, which is the name or header of the ContentObject. Therefore, let’s take a look at the content object:
class ContentObject: ObservableObject {
  let publisher : AnyPublisher<String, Never>
  var cancellable : AnyCancellable!
  @Published var name : String = "" {
    willSet {
      objectWillChange.send()
    }
  }

  static fileprivate func markdownTitlePublisher(fromURL url: URL) -> AnyPublisher<String, Never> { … }

  init () {
    self.publisher = ContentObject.markdownTitlePublisher(fromURL: ContentObject.url)
    self.cancellable = self.publisher.receive(on: DispatchQueue.main).sink{ self.name = $0 }
  }
}
In this instance, there is an initializer which creates the publisher for the markdown file’s h1 name . Inside the initializer, we create a publisher for the name, followed by setting up the assignment of the result to the name property. Firstly, it creates the publisher. Next, similar to before with UIKit updates, the code tells the publisher that it must receive the changes on the main DispatchQueue. Lastly, it tells the publisher to assign the value to the name property on self. With the initializer, the code has setup the publisher for the name of the content, a cancellable for the publisher assignment, and the
@Published property of the name. Therefore, let’s breakdown how the publisher is created in ContentObject.markdownTitlePublisher(forURL:):
static fileprivate func markdownTitlePublisher(fromURL url: URL) -> AnyPublisher<String, Never> {
  return URLSession.shared.dataTaskPublisher(for: url).tryMap { (arg: URLSession.DataTaskPublisher.Output) throws -> String  in
    let (data, _) = arg
    let text = String(data: data, encoding: .utf8)
    guard let value = text?.components(separatedBy: .newlines).first else {
      throw InvalidTextError()
    }
    return value
  }.catch({ (error) in
    return Just(nil)
  }).compactMap{ $0 }.eraseToAnyPublisher()
}
Functional Programming with Combine
Luckily, Combine provides already built-in methods for publishers for the three main asynchronous APIs, which I talked about previously: NotificationCenter, Timer, and URL tasks. In this case, let’s look at how URL Task publisher transforms to useable String value for the name property:
tryMapreads the first line of text by decoding the binarydatainto text and reading the first line.catchconverts the useless error into nil... **For a SwiftUI View to use a publisher, the publisher must always handle the error in order to assign the value.**compactMapremoves any nil values from the publisher pipelineeraseToAnyPublisheruses type erasure to remove the specifics conversions taken place.
Therefore, with all the plumbing in place, SwiftUI and Combine will display the display the first line of the markdown file.
In conclusion, Combine really shows it’s power when it comes to UI updates (not just SwiftUI but UIKit, AppKit, etc…) and any situation where reactive programming makes sense such as when there are multiple publishers and subscribers. However if you are comfortable with Promises and Futures and your code is more simple and straightforward it’s perfectly reasonable to go with that method.

Coroutines - The Future of Asynchronous Operations
Before closing out, there has been proposals for making Promises and Futures native in Swift along with the syntactic sugar some common in other languages known as Coroutines. (Read more about Coroutines in Chris Latner’s proposal.) Let’s take a look at our earlier example:
let url = URL(string:
 "https://jaspervdj.be/lorem-markdownum/markdown.txt")!
URLSession.shared.dataTask(with: url) {
 (data, response, error) in
  …
}.resume()
In this case, a closure is based as a parameter along with a task. However a Promise or Future might look something like this:
let url = URL(string:
 "https://jaspervdj.be/lorem-markdownum/markdown.txt")!
let promise : Future<(Data?, HttpResponse?, Error?)> = URLSession.shared.data(with: url)
With syntactic sugar like async and await, it become even cleaner with:
let url = URL(string:
 "https://jaspervdj.be/lorem-markdownum/markdown.txt")!
let response = await URLSession.shared.data(with: url)
To declare a method as being asynchronous and wrap a previous method (using a callbackWrap method for now) such as setupSite previously:
public func setupSite(_ site: Site, withTheme theme: Theme) async throws -> Site {
  return await callbackWrap { continuation in
  self.setupSite(site, withTheme: theme) { error in

      if let error = error {
        continuation(error)
      } else {
        continuation(site)
      }
    }
  }
}
With async and await along with Combine, Swift can really take advantage of asynchronous programming both from the simple Promise/Future mindset as well as the Reactive programming paradigm.
What’s the Right Toolset?
In conclusion, developers have some key decisions when it comes to the best way to deal with asynchronous, parallelism, and concurrency:
- Take Advantage of Your Hardware - make sure not to lock down the whole device or application with one thread but allow for many actions to take place simultaneously
- Avoid Convoluted Logic in favor of Easy Maintenance - make it easier for the next developer to update your code, don’t over optimize without componentizing
- Provide Fast UI Experience over a Speedier Logic - giving healthy feedback to the user of what’s going on is more important than a faster application - again avoid freezing your app and device
- Use Abstractions As Much As Possible - unless you are into highly processor intense applications - use Apple’s provided abstractions (i.e. Combine, etc..) rather lower-level direct APIs (i.e. Threads)
- Avoid Callback Hell with Promises and Futures - for simple non-UI code use Promises and Futures to organize multiple asynchronous calls as opposed to a pyramid of callbacks
- For UIs on the latest Operating Systems (iOS 13, watchOS 6, tvOS 13, Catalina) use Combine - Combine gives the OS better control of the flow multiple asynchronous operations using reactive patterns
Hopefully this article gives you more guidance on how to better manage multiple operations and optimize your application for a better user experience. I am looking forward to even better APIs with Swift in the future.
If you have any questions, reply to me on Twitter @leogdion and if you want to learn more fill out the form below: